Introduction
Mighty Restaurant is a modern, all‑in‑one Restaurant & Inventory Management System built with Flutter. It is designed for retail stores, restaurants, supermarkets, and small to medium businesses.
The system offers fast billing, inventory tracking, customer management, and detailed sales reports from a single powerful platform.
Installation on Live Server
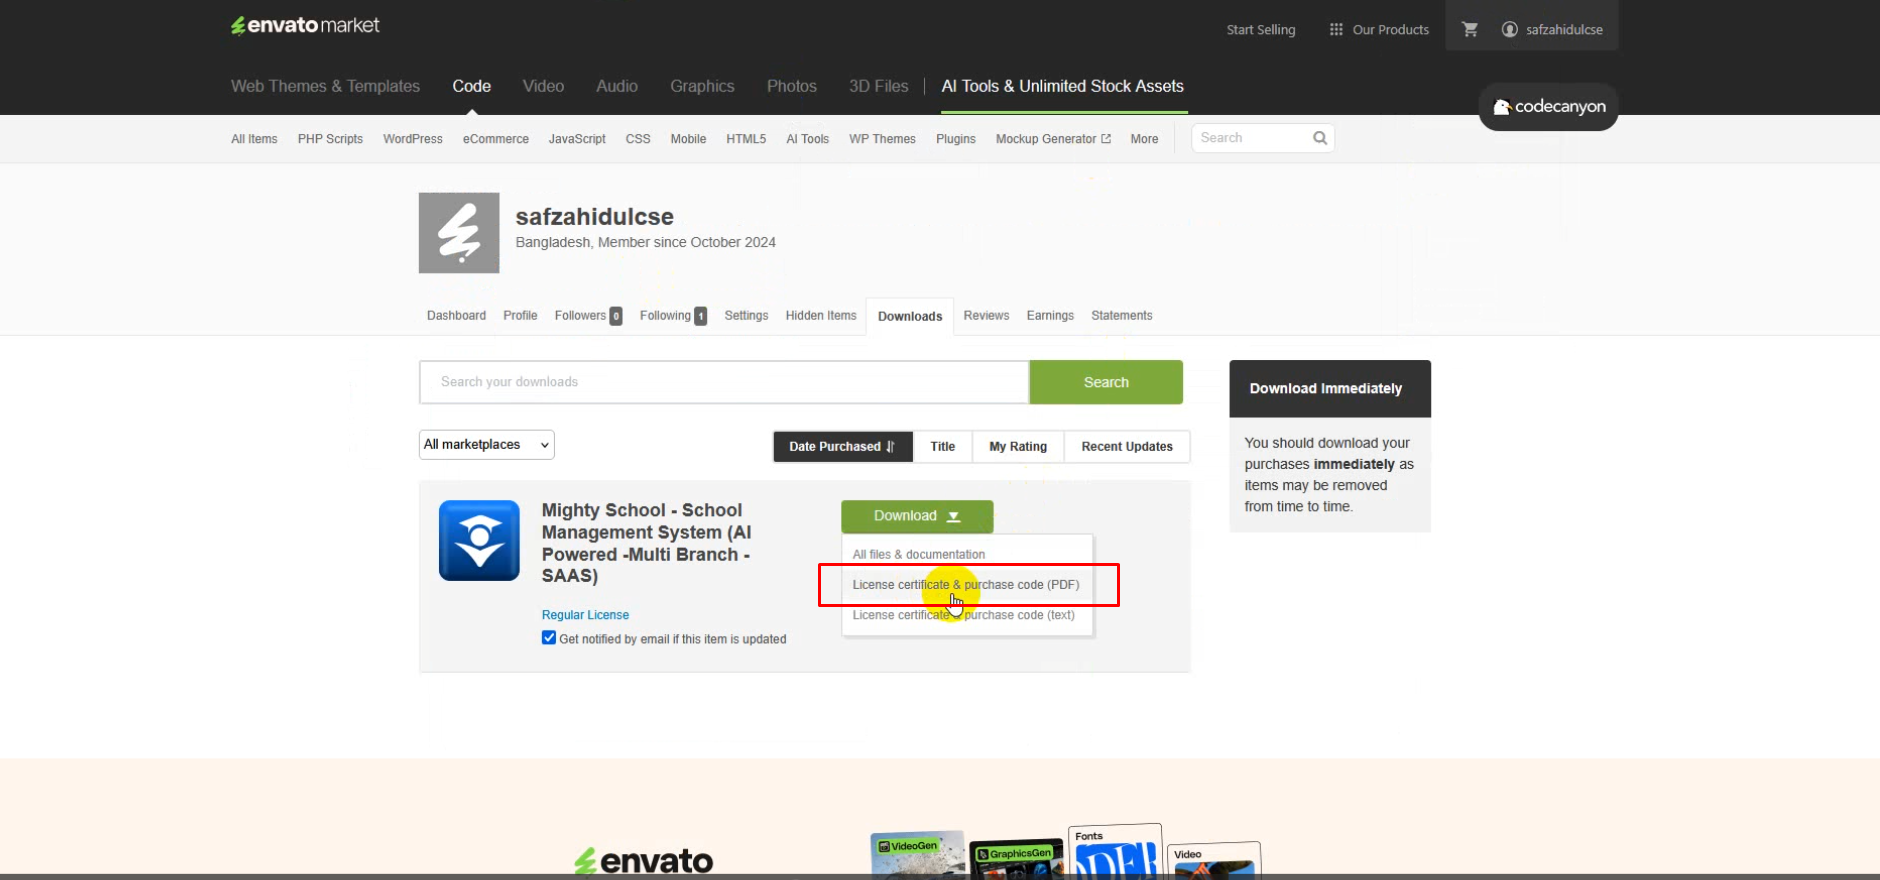
Step 1 — Download Script From Envato
Login to your Envato (CodeCanyon) account. Navigate to Downloads → Click Download → All Files & Documentation. Extract the downloaded ZIP file on your computer.
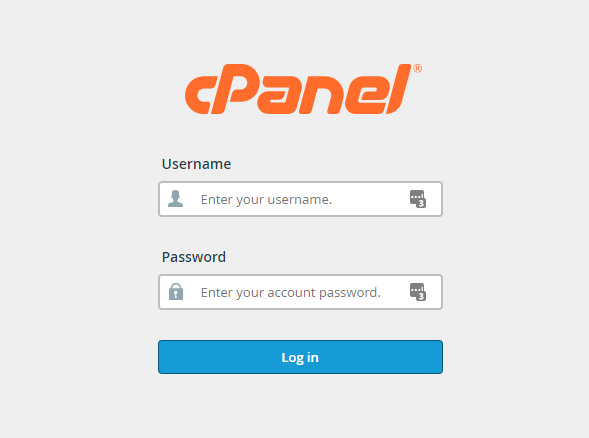
Step 2 — Login To Hosting Control Panel
Login to your hosting control panel (cPanel or DirectAdmin). This panel will be used to manage domains, files, and databases.
Step 3 — Server Requirements Check
Make sure your server meets the following minimum requirements:
- PHP Version: 8.2 or higher
- MySQL Version: 5.7+ or MariaDB
- Required PHP Extensions:
- Fileinfo
- GD
- JSON
- OpenSSL
- PDO
- XML
- Mbstring
- CURL
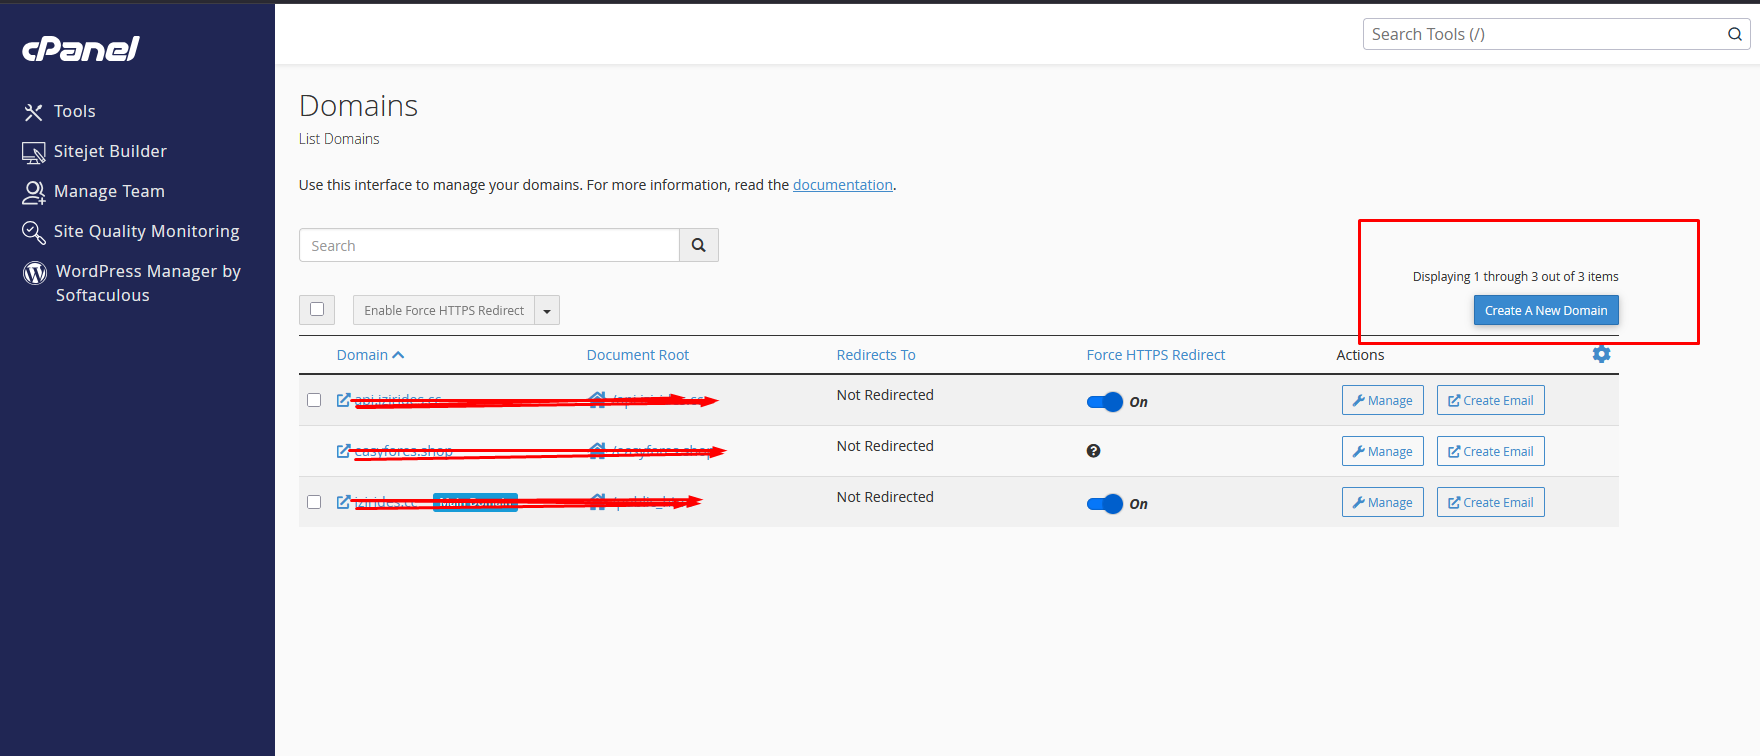
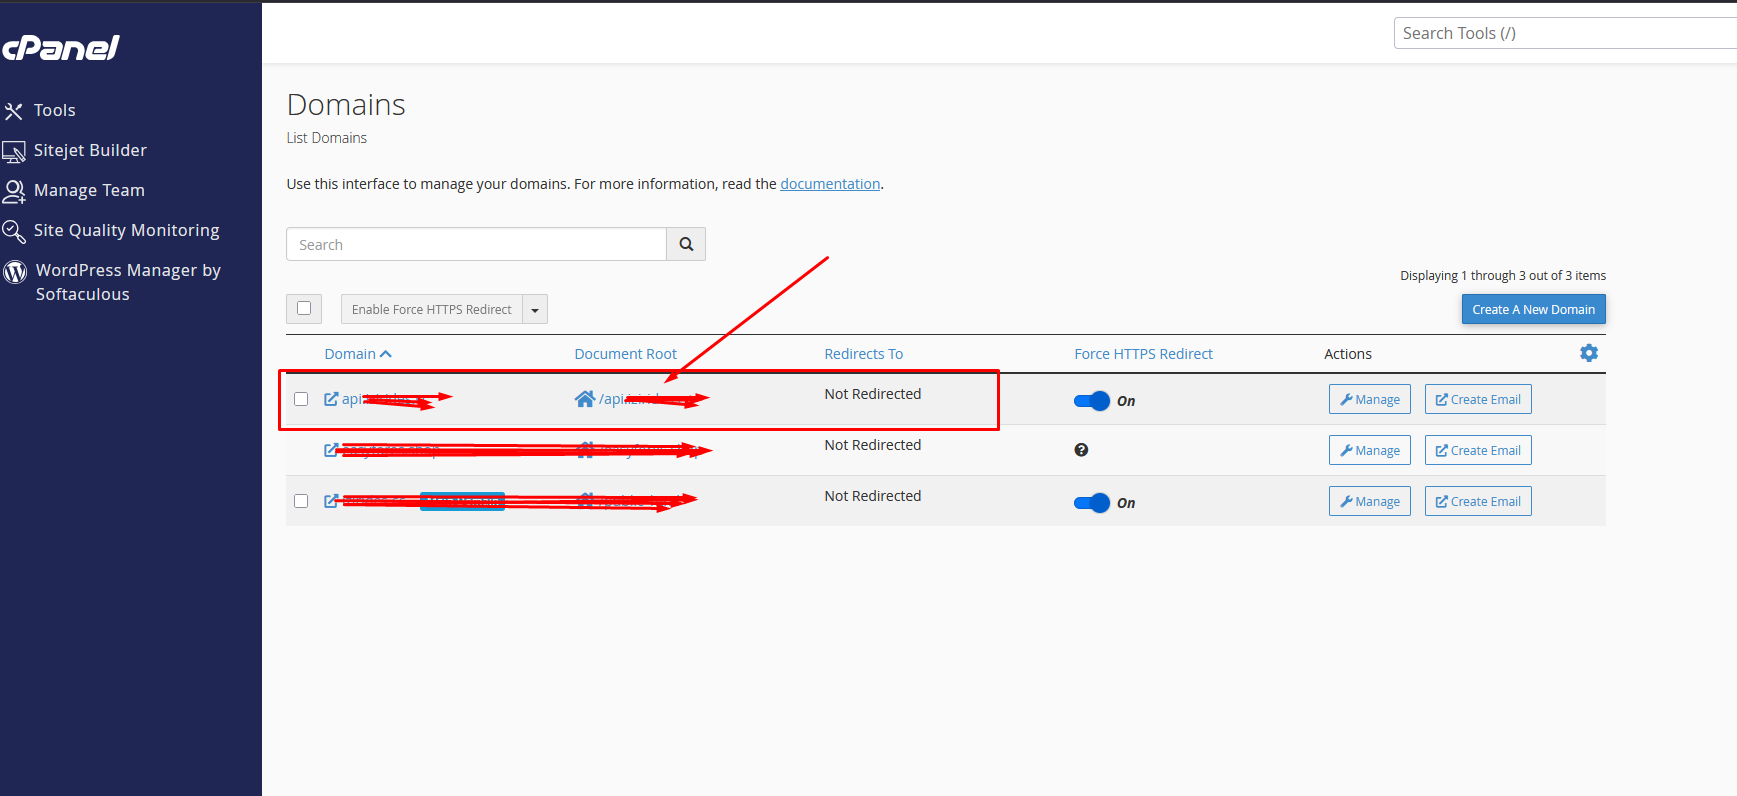
Step 4 — Create Subdomain For API
Go to Domains section and create a subdomain for API usage.
api.yoursite.com
Using a separate API subdomain improves security and performance.
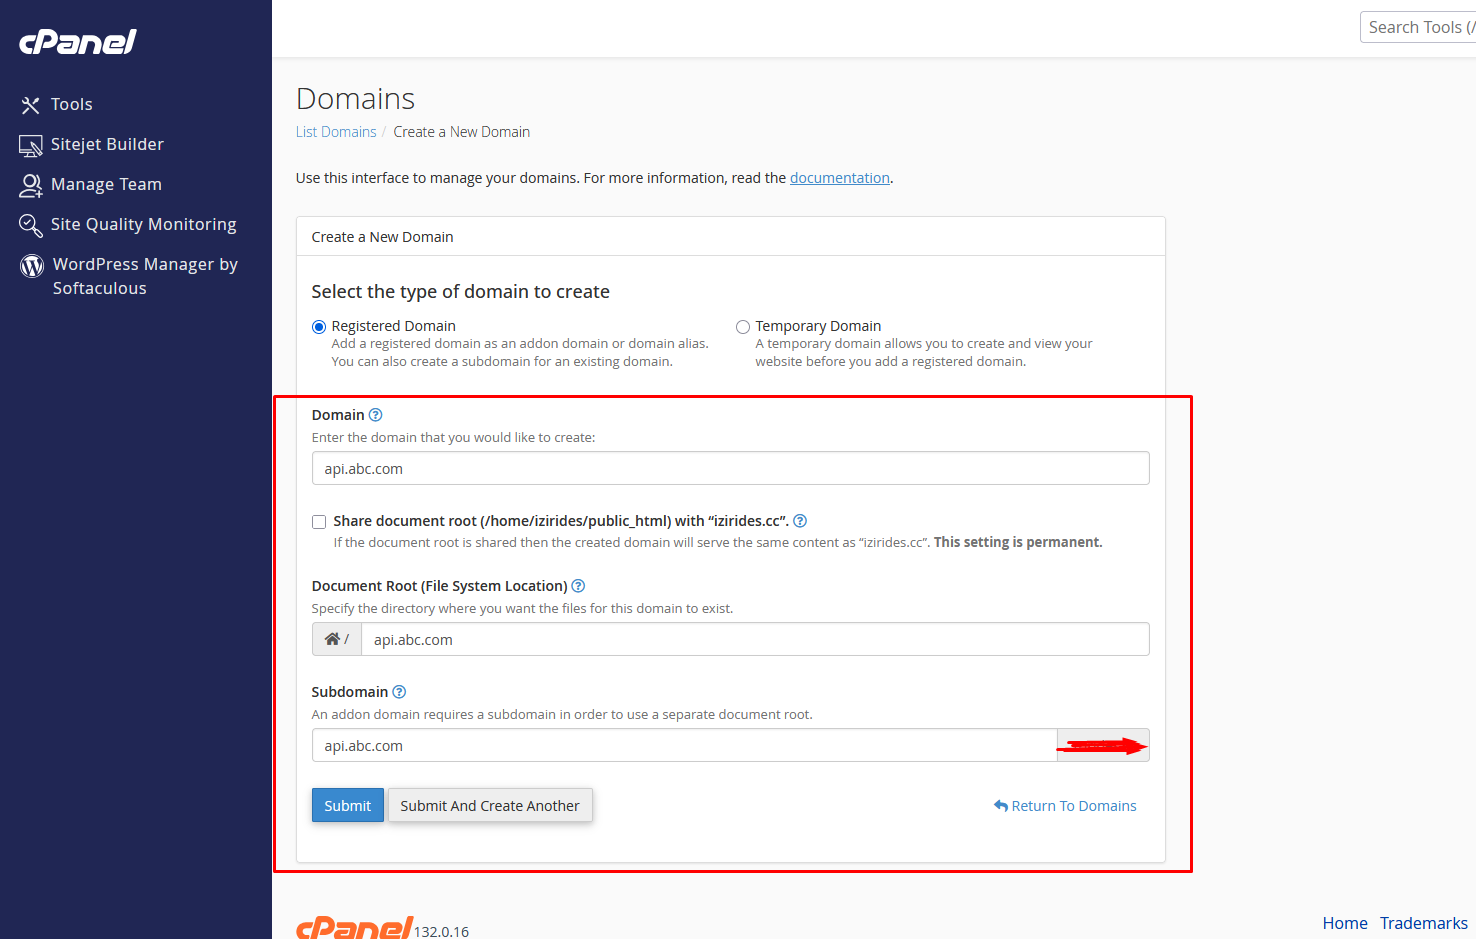
Step 5 — Select Subdomain Directory
Select the installation directory for API files. Recommended folder:
public_html/api
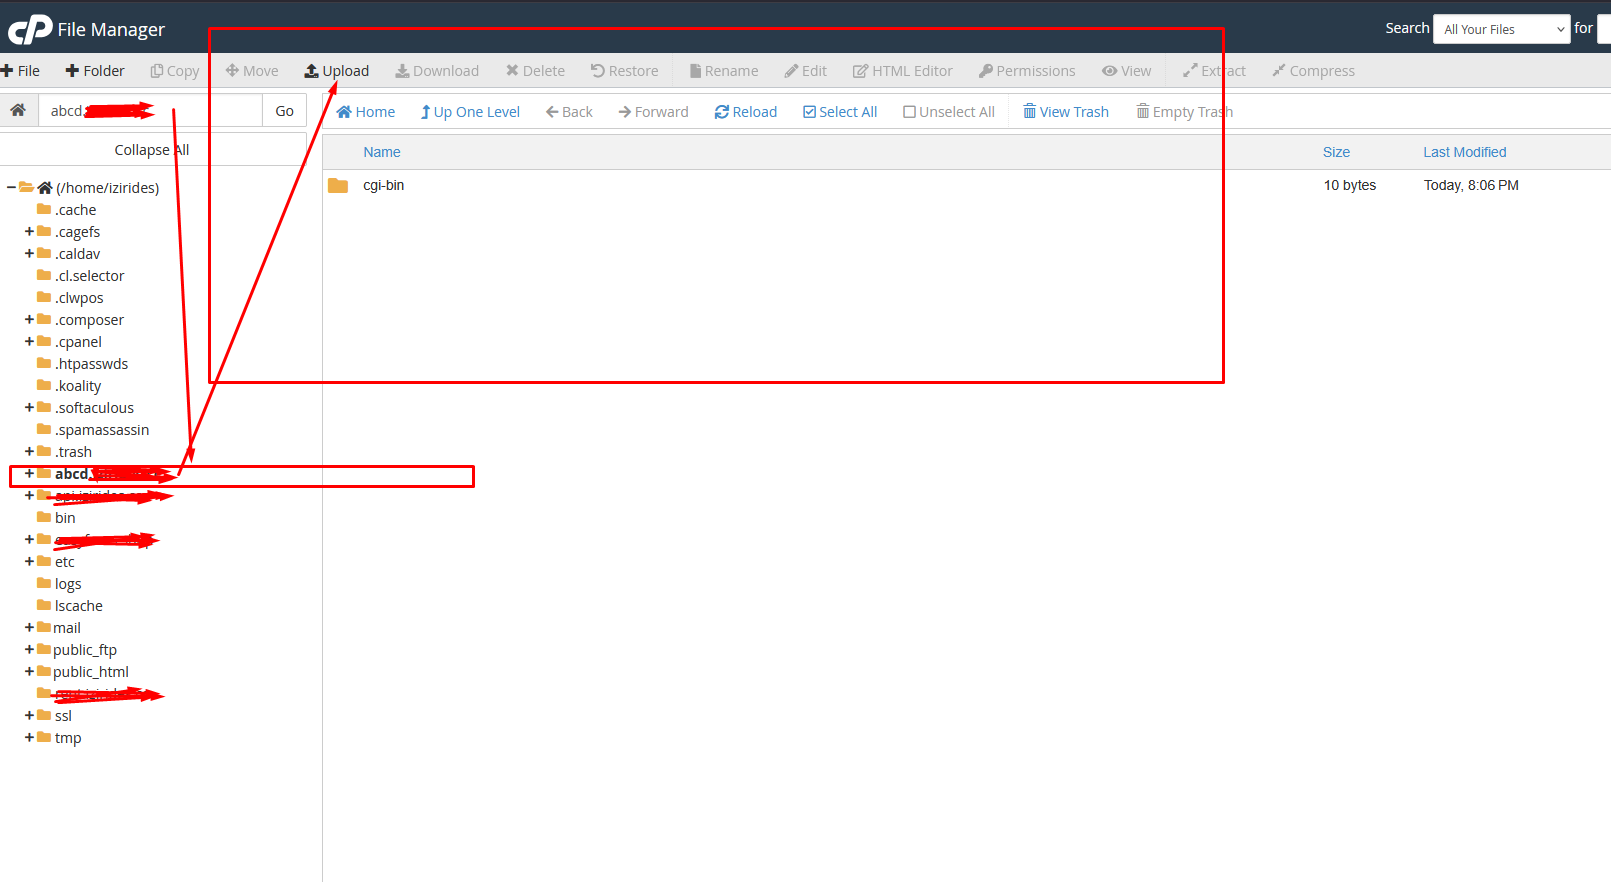
Step 6 — Open API Folder
Open the API folder from File Manager. This is where system files will be uploaded.
Step 7 — Upload System Files
Upload the following file into the API folder:
mighty-restaurant-api-code.zip
After upload completes, extract the ZIP file.
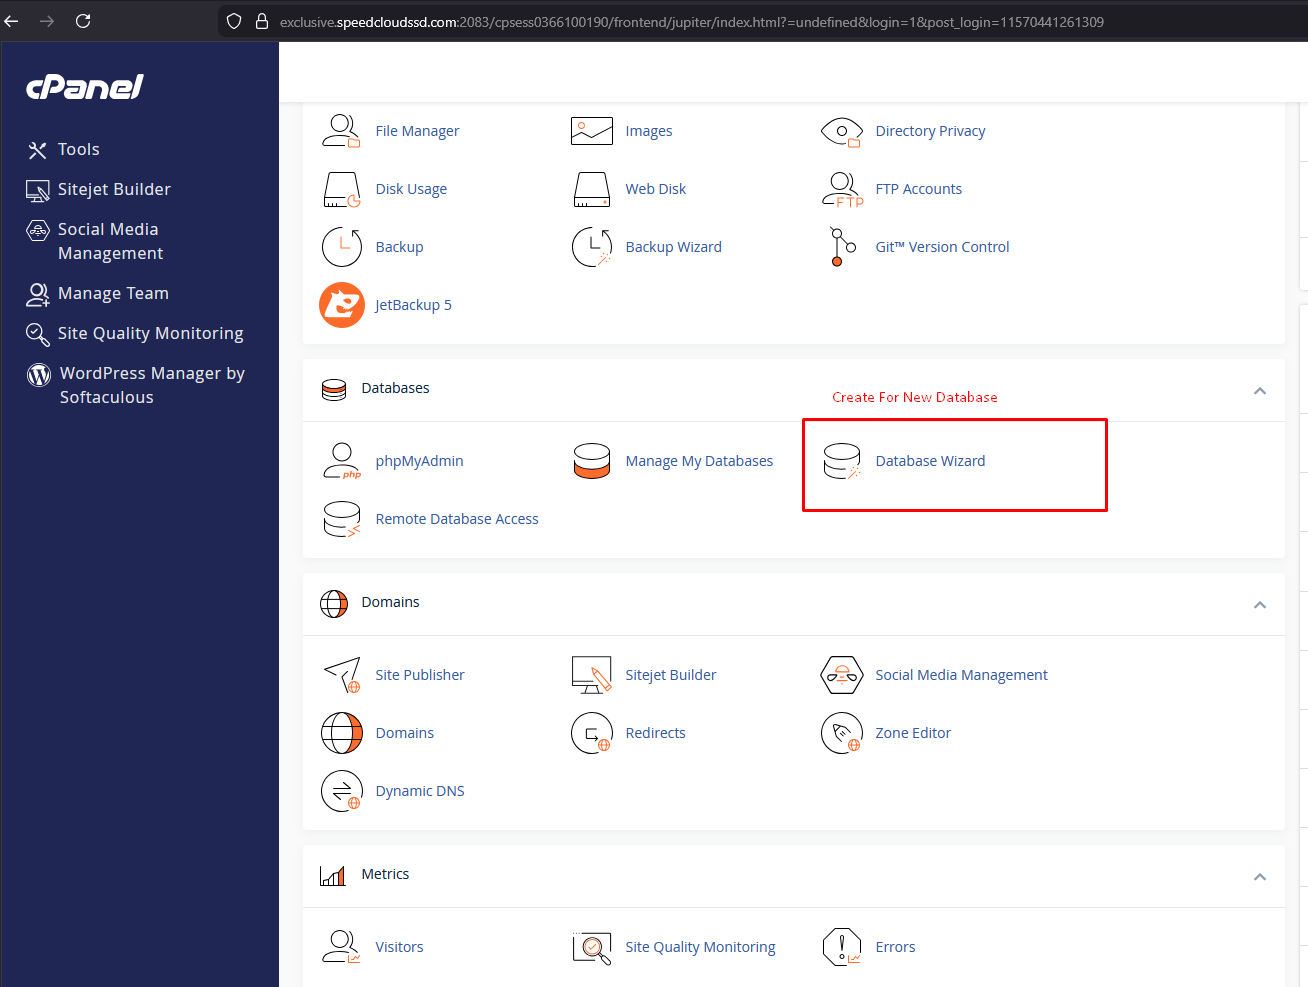
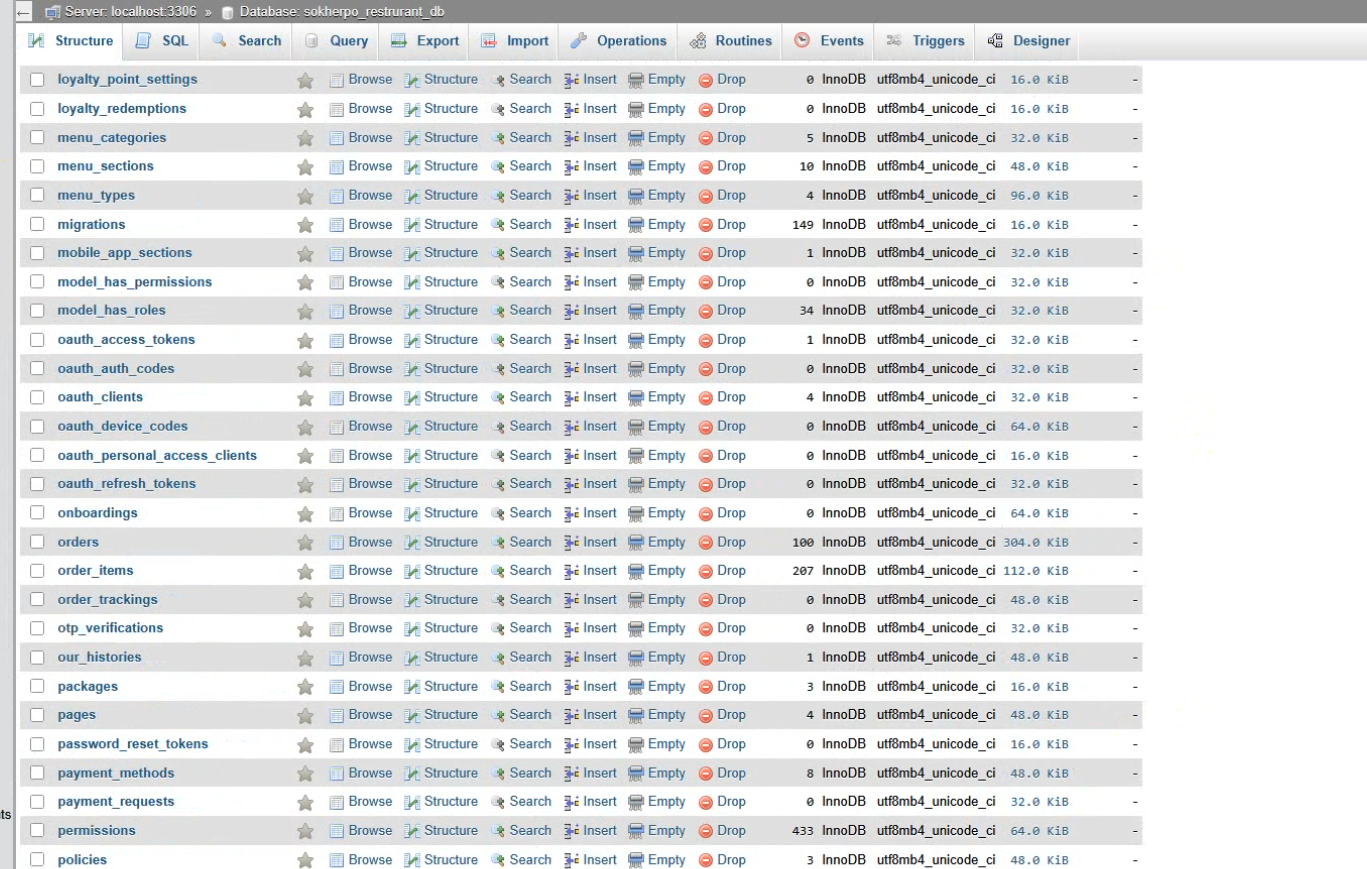
Step 8 — Create Database
Open MySQL Database Wizard from cPanel.
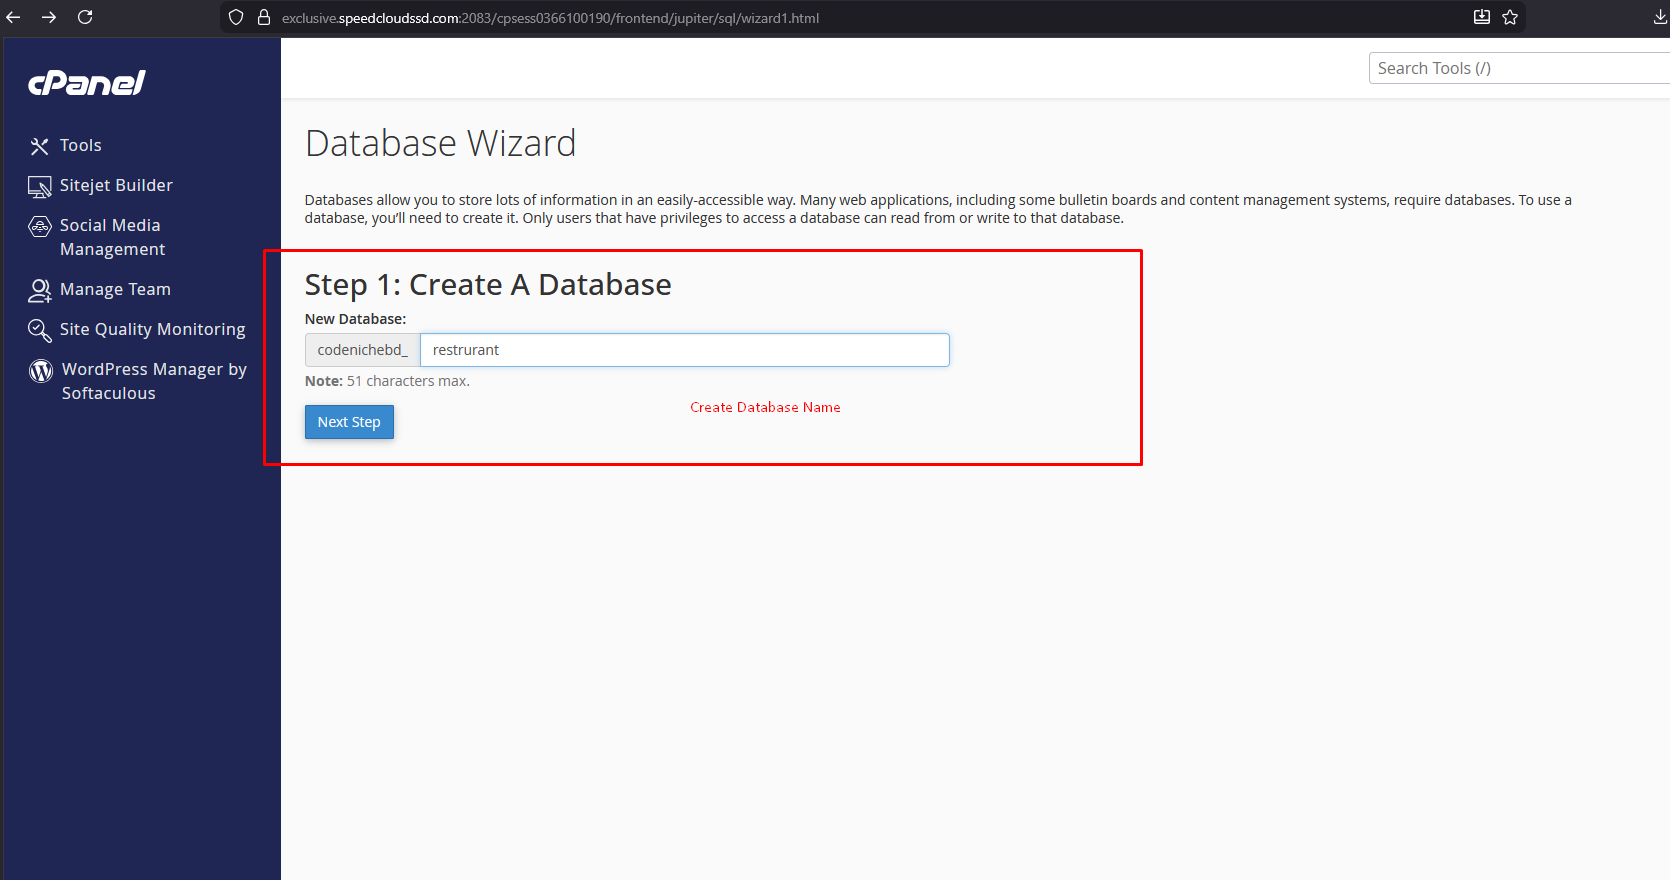
Step 9 — Create Database Name
Enter database name and click Next.
mighty_restaurant_db
Step 10 — Create Database User
Create database username and password. Save these credentials safely.

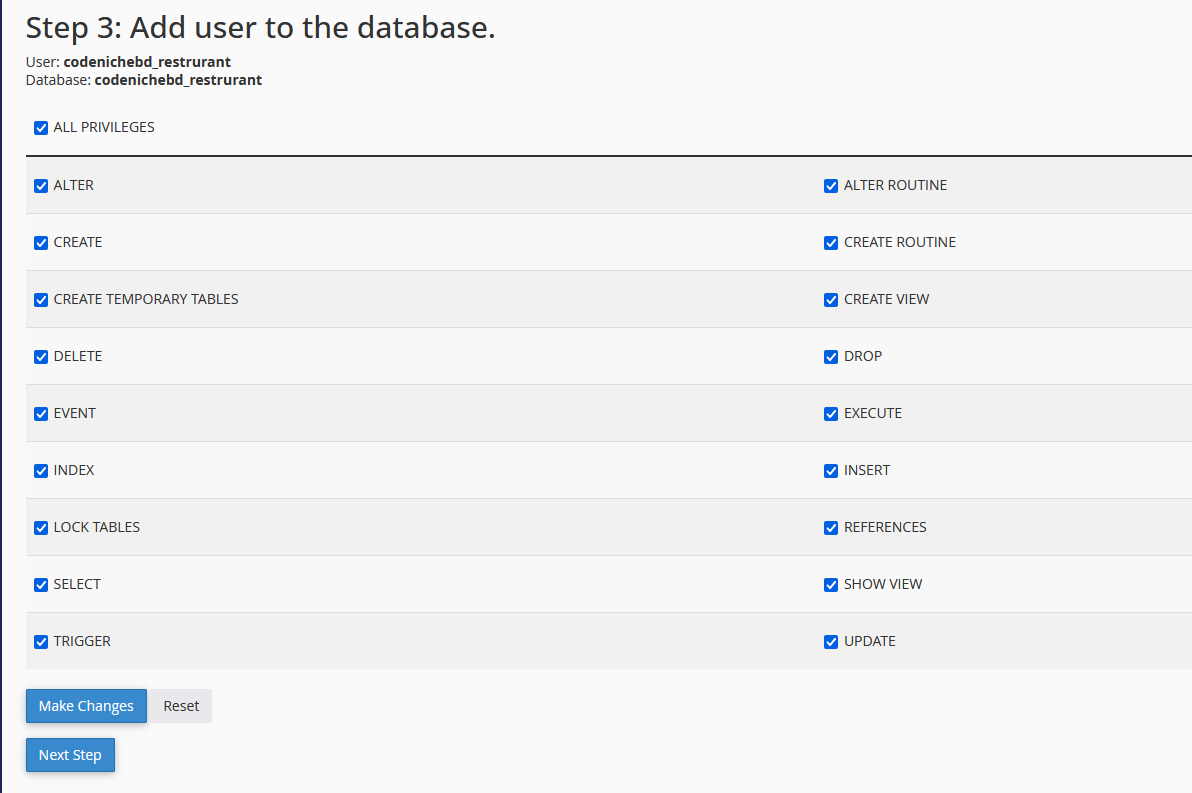
Step 11 — Assign Database Privileges
Select ALL PRIVILEGES and continue.
Step 12 — Open Installation Wizard
Open your browser and visit:
https://api.yoursite.com/install
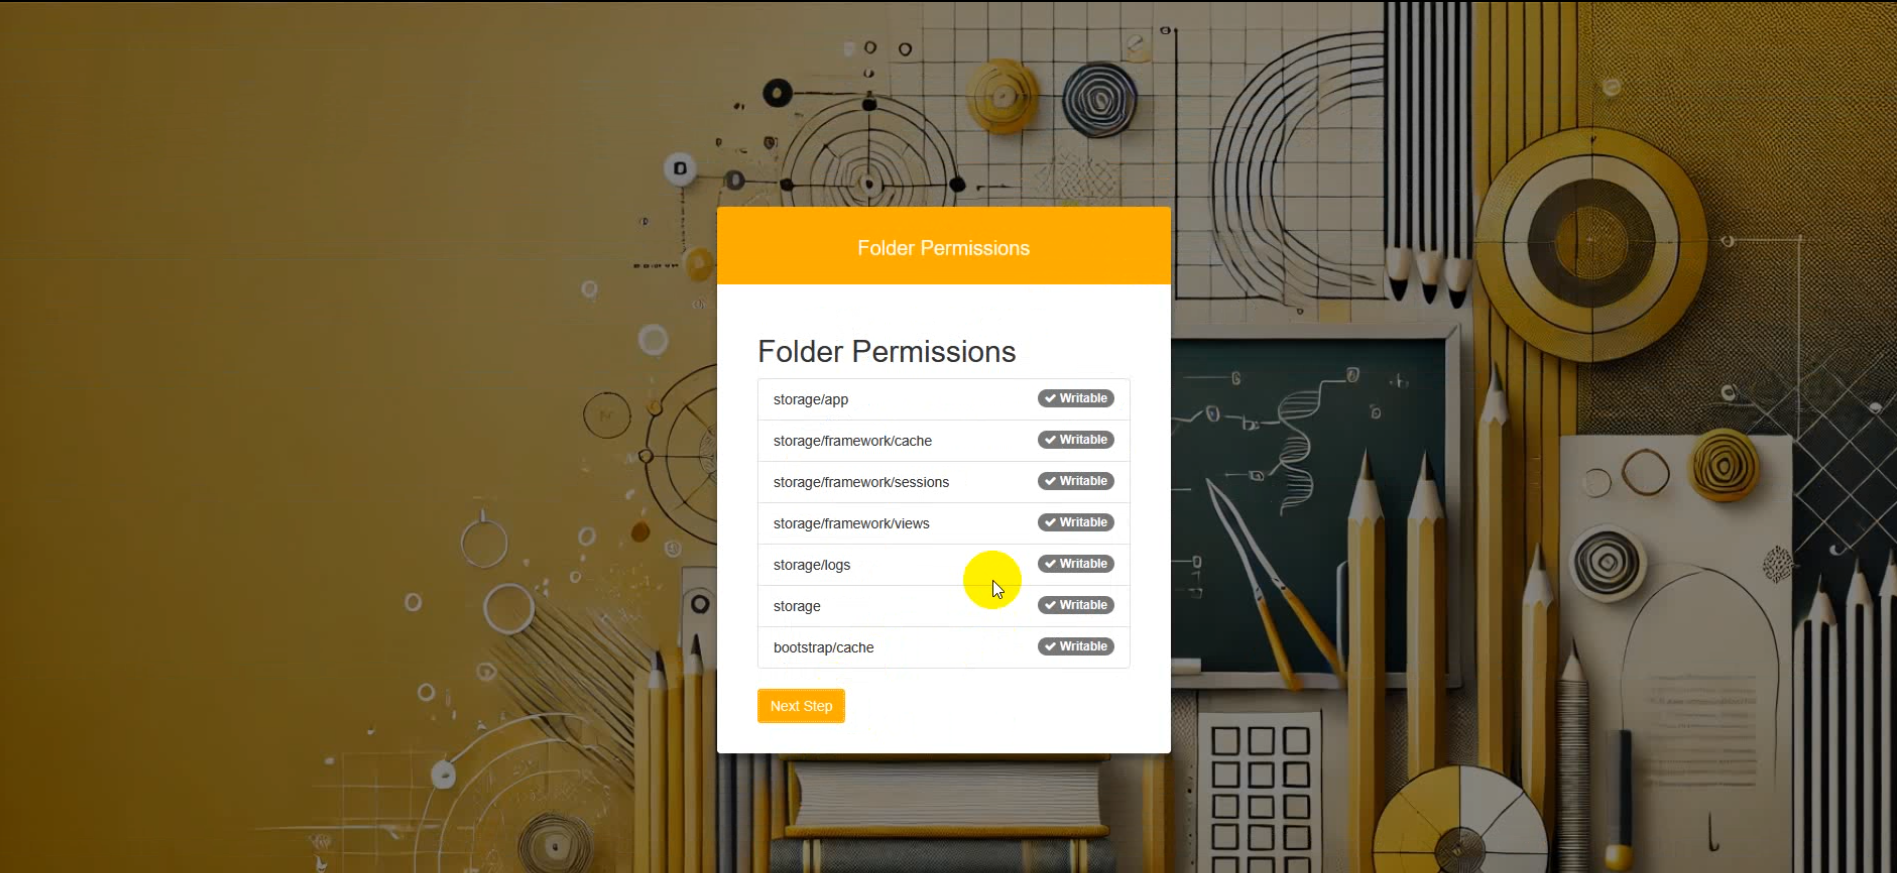
Step 13 — Set Folder Permissions
Set following folders permission to 775:
- storage
- bootstrap/cache
These permissions are required for Laravel caching, logs, sessions and uploads.
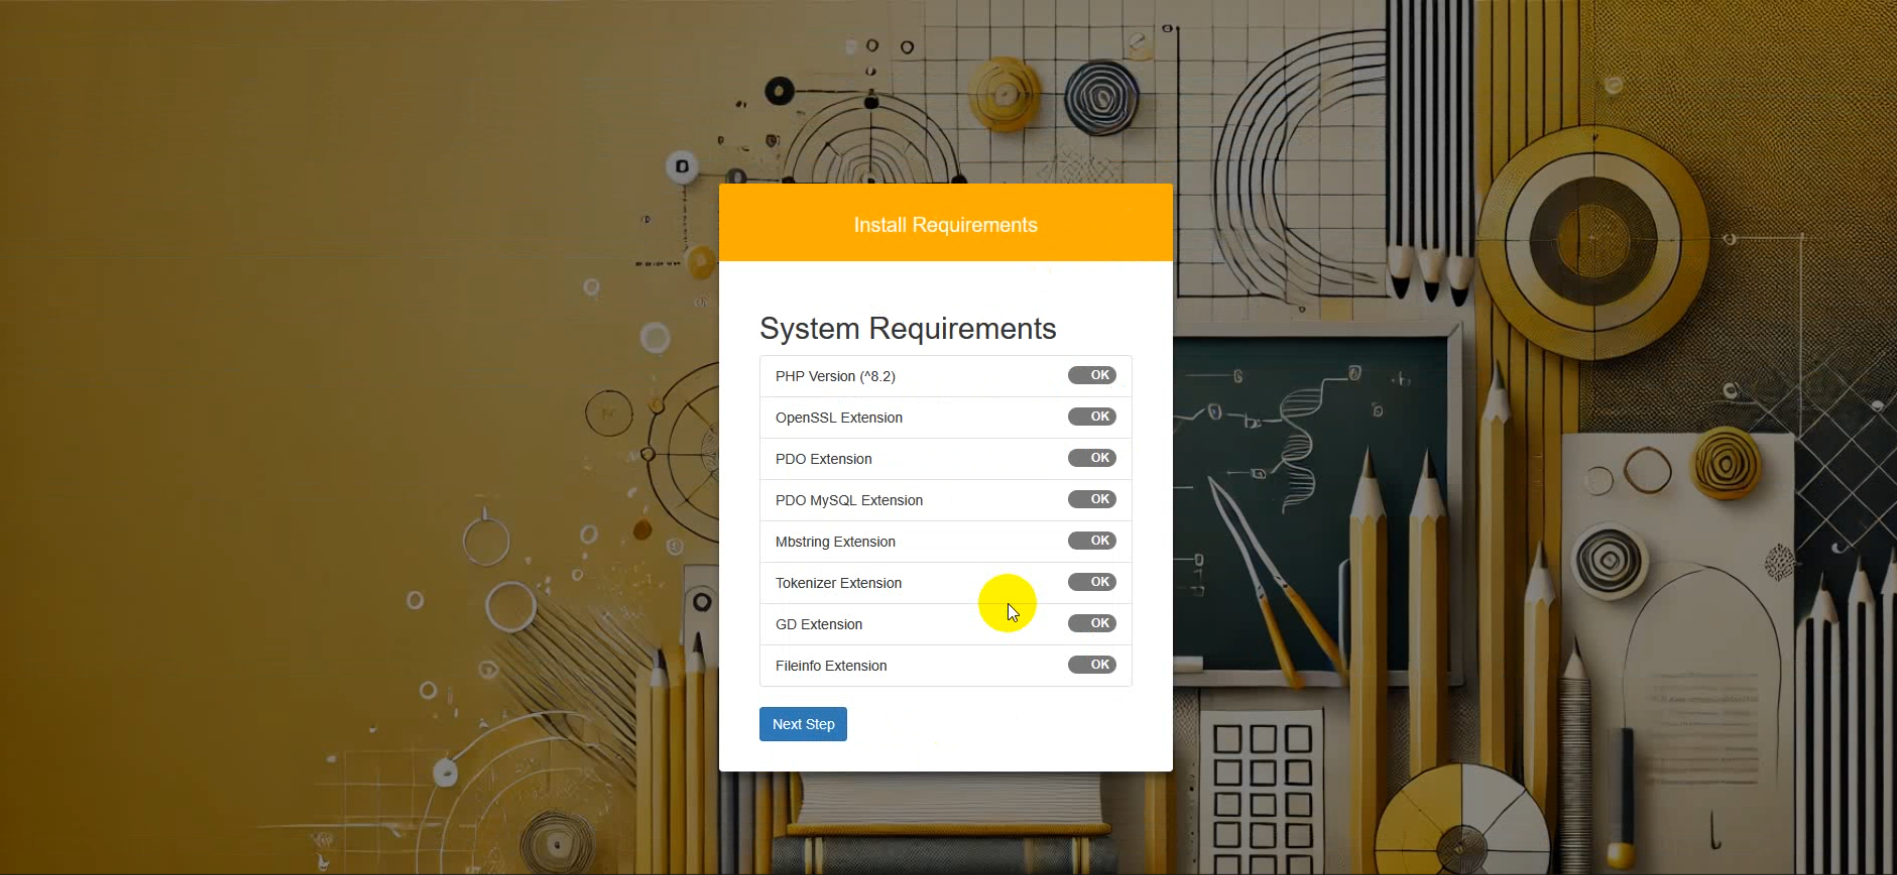
Step 14 — Server Requirement Verification
Installer will automatically verify:
- PHP Version
- Required PHP Extensions
- Writable Folder Permissions
Step 15 — Purchase Code Verification
Enter your Envato purchase code and username to activate your license.

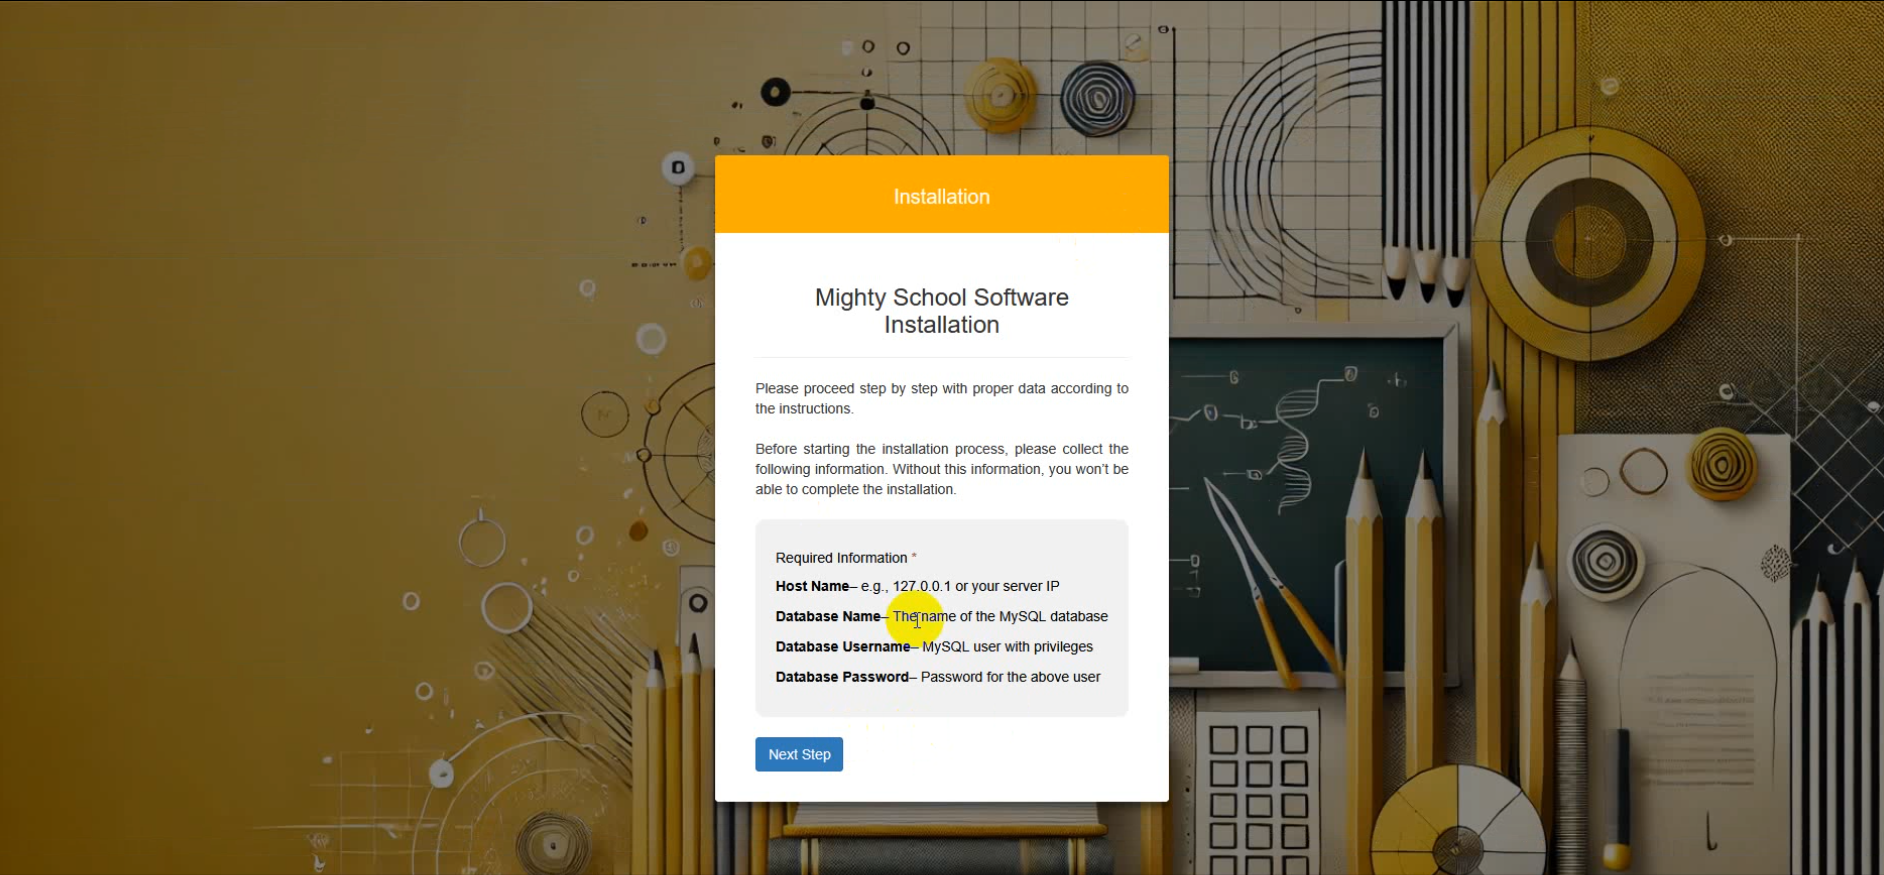
Step 16 — Database Configuration
Enter your database credentials:
- Database Name
- Database Username
- Database Password
- Database Host (usually localhost)
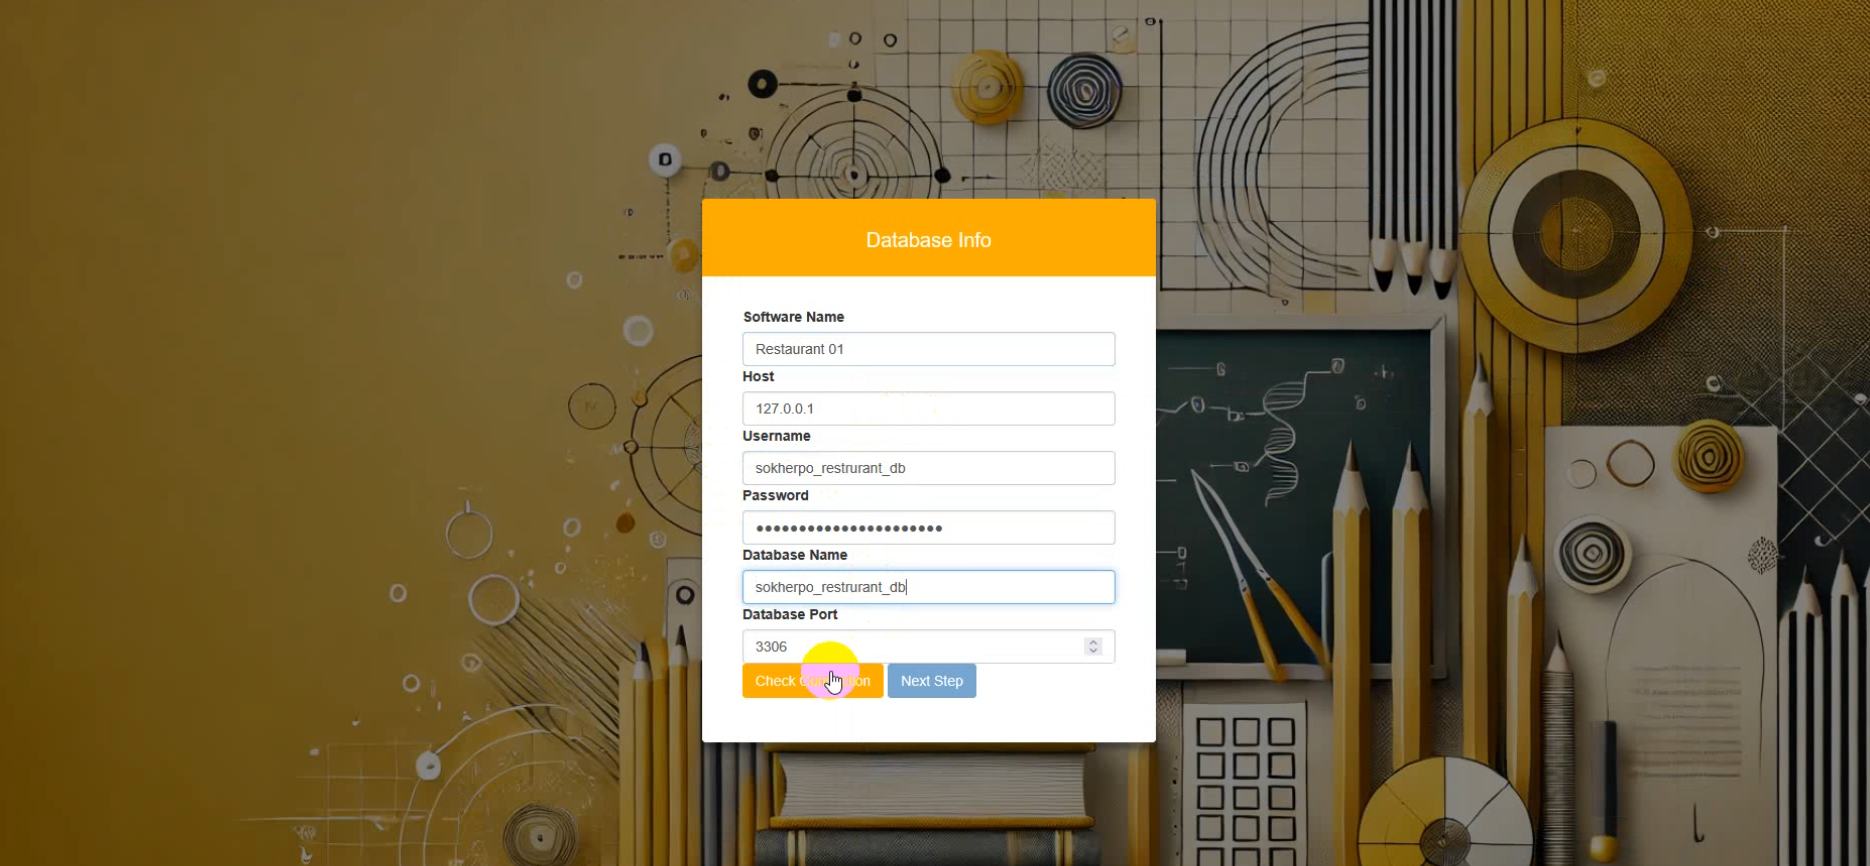
Step 17 — Test Database Connection
Click Test Connection. If successful, continue to next step.
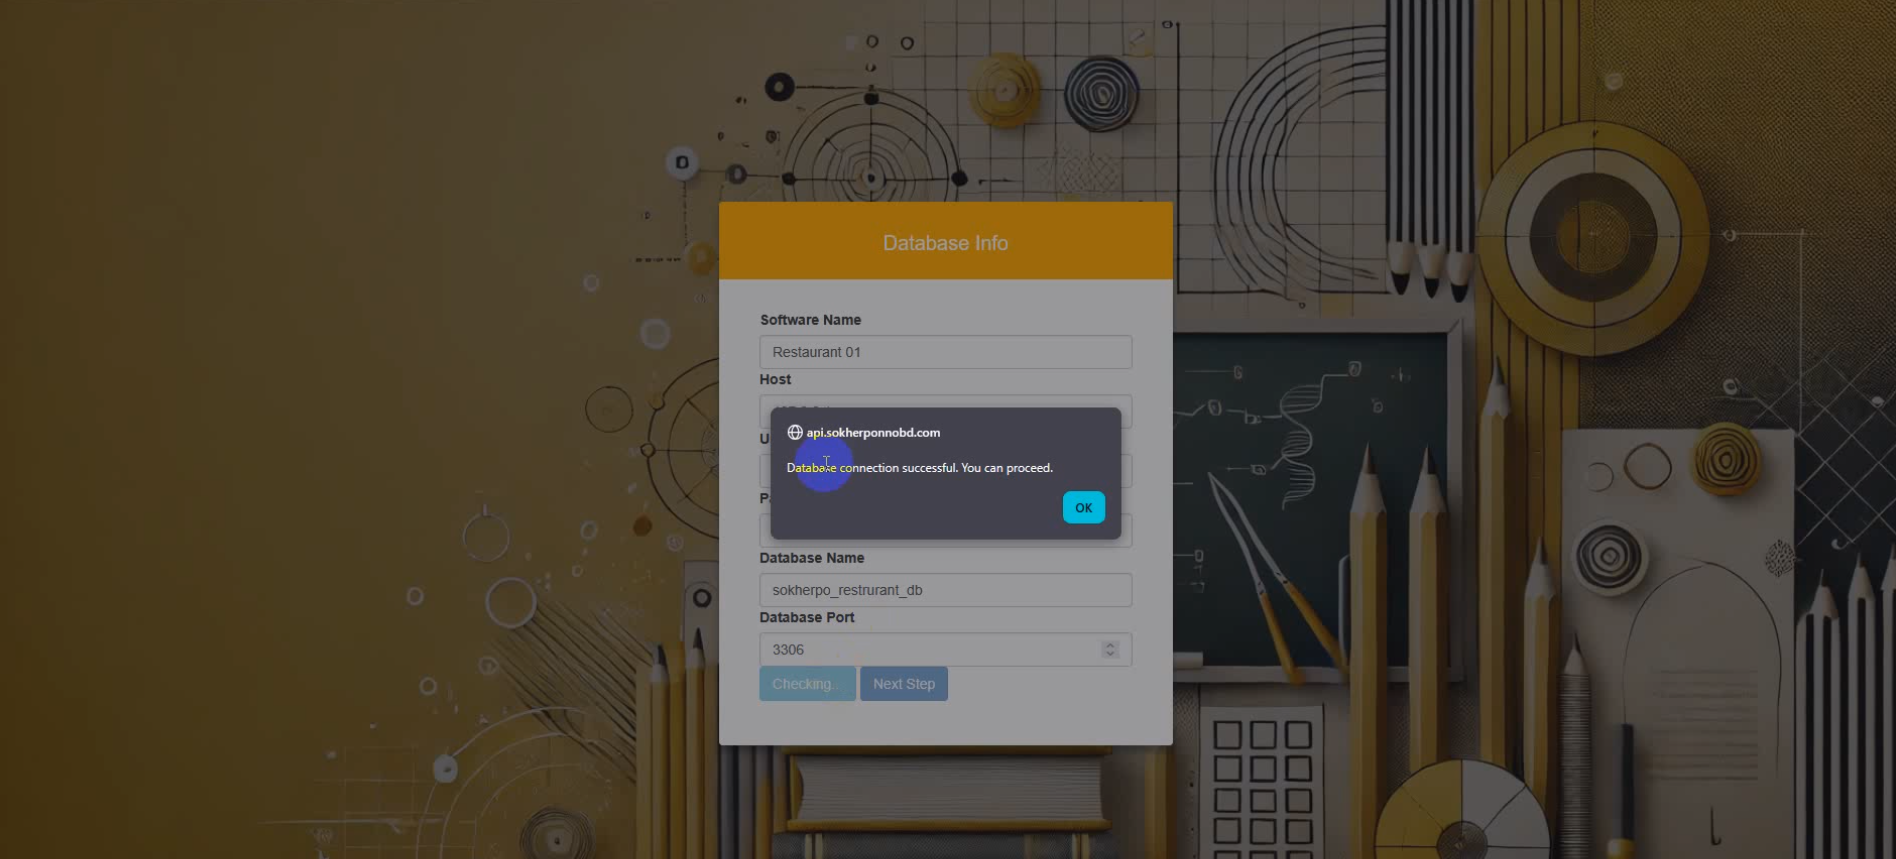
Step 18 — Installation Processing
System will now:
- Create database tables
- Insert demo data
- Generate application key
- Optimize configuration
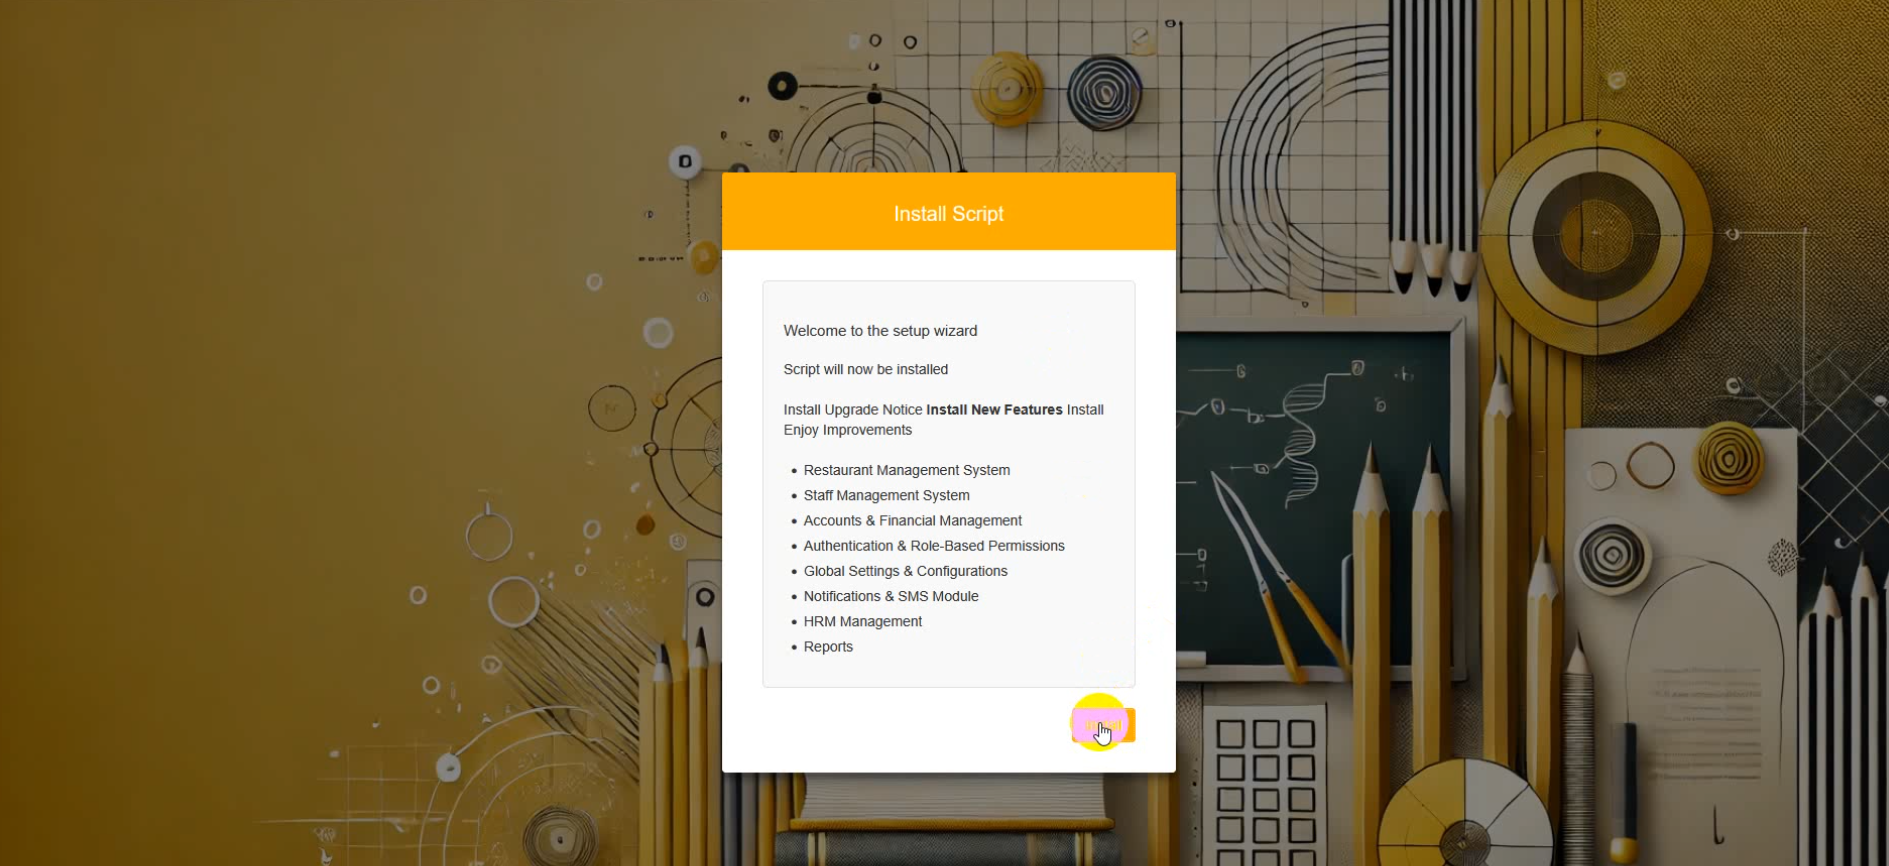
Step 19 — Installation Completed Successfully
Installation completed successfully. You can now login to the admin panel and start using the system.
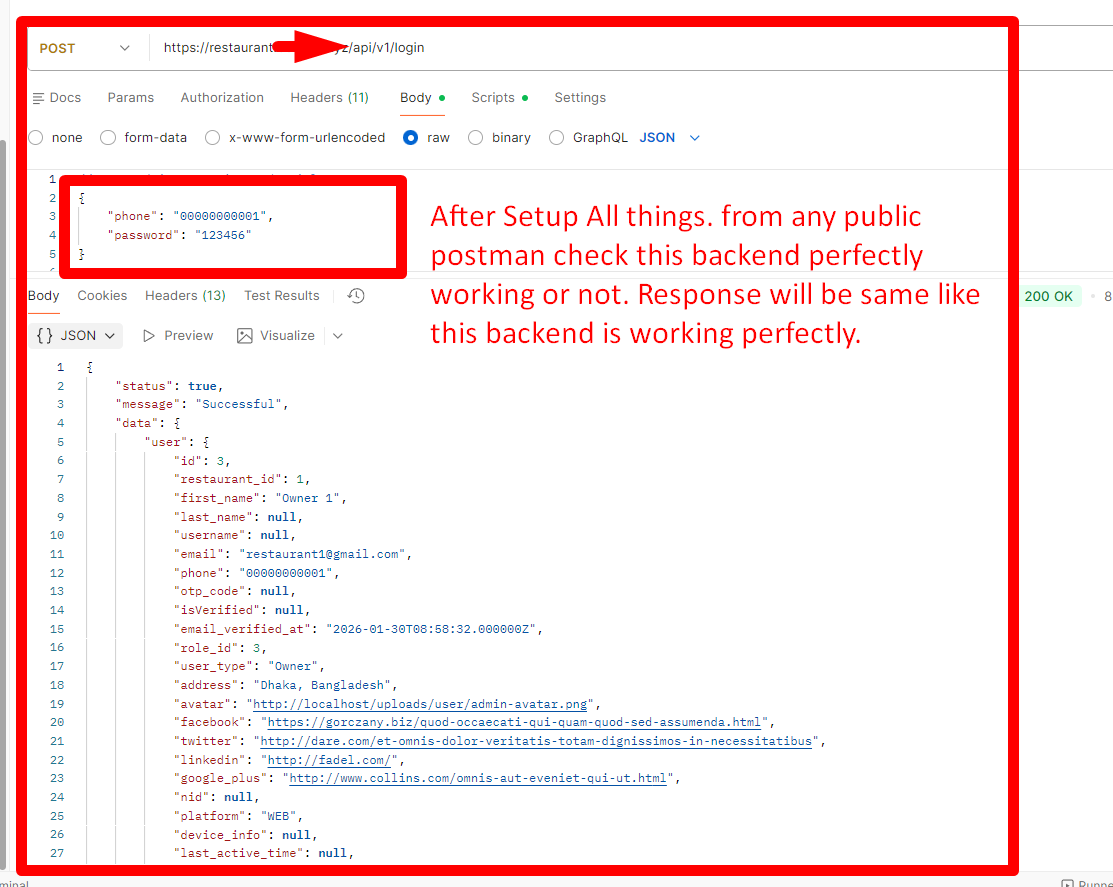
Step 20 — Test API Using Postman
Import the provided Postman collection and verify API responses.
Installation on Local Server (XAMPP / Laragon / WAMP)
Follow the steps below for localhost installation:
- Install XAMPP, Laragon or WAMP
- Start Apache and MySQL services
- Ensure PHP version is 8.2+
Create database using phpMyAdmin:
http://localhost/phpmyadmin
Extract project files into:
htdocs/mighty-restaurant
Open installer:
http://localhost/mighty-restaurant/public/install
Follow the same installation steps as Live Server.
📱 App Setup
Mighty Restaurant allows you to launch your own branded app easily with minimal configuration.
🎨 Branding & Theme Customization
- Change app color theme
- Replace logos and icons
- Apply branding with minimal configuration
🌐 Set Base URL
Open the following file:
/lib/utils/app_constant.dart
Update the base URL:
static const String baseUrl = "https://yourdomain.com";
Rebuild the app after updating.
Change App Name
- Edit
appNamein/lib/utils/app_constant.dart - Update label in
AndroidManifest.xml - Update app name in
Info.plist


Change App Package Name
Use IDE global replace carefully. Replace the existing package name with your new one.
 ⚠ Warning: Incorrect changes may break the build.
Change App Icon & Logo
- Generate icons from appicon.co
- Android: Replace mipmap folders in
/android/app/src/main/res - iOS: Replace
Assets.xcassetsin/ios/Runner - Replace logo in
/assets/image/logo.png
Build APK / App Bundle
flutter build apk --split-per-abi
flutter build appbundle
flutter build apk --target-platform android-arm,android-arm64,android-x64 --split-per-abi
Web Setup
Change Branding
- Logo:
/web/logo.png - Header Logo:
/web/appbarlogo.png - Favicon:
/web/favicon.png - Title & Description:
/web/index.html - PWA Name:
/web/manifest.json
Build Web
flutter build web

Upload files from /build/web/ to your domain (including hidden files).

After successfully build. open /build/web folder. You will see web folder. Zip it and upload to your server.

Yor are Done! Your web is live now.